
Clay and white models
Turn a clay model into a realistic render
Upload a clay render with Input set to Clay / white model, and ArchFor gives each surface a material while keeping the light direction already in the shading. Massing, openings and camera stay as modeled, and every click returns four options at 2K by default. ArchFor is a web app that turns 3D model screenshots, sketches and existing renders into photorealistic architectural images. Credit packs from $9.99; no plugin and no subscription required.
- Mid-grey clay reads better than pure white
- The sun direction in your shading is kept
- Takes clay views from SketchUp, Rhino or Blender
Updated November 3, 2026
Before and after
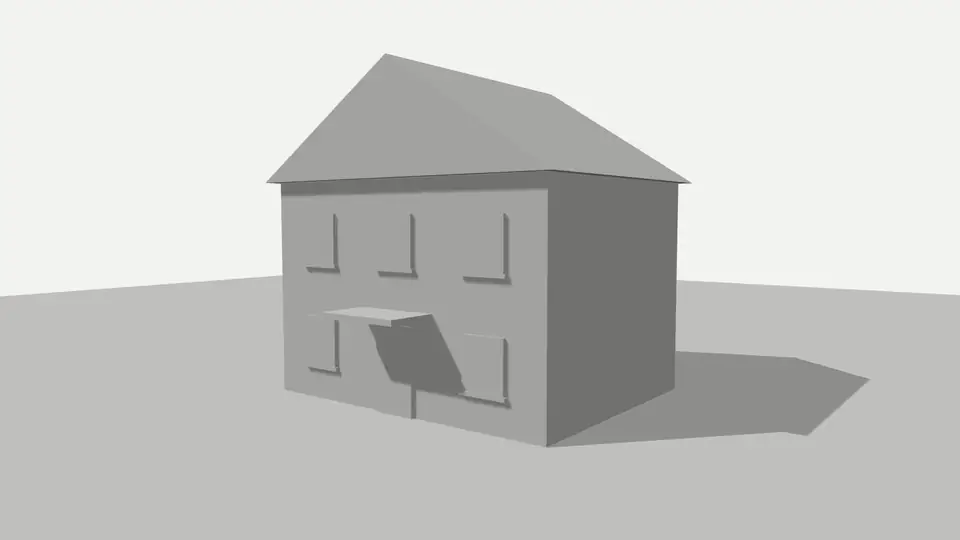
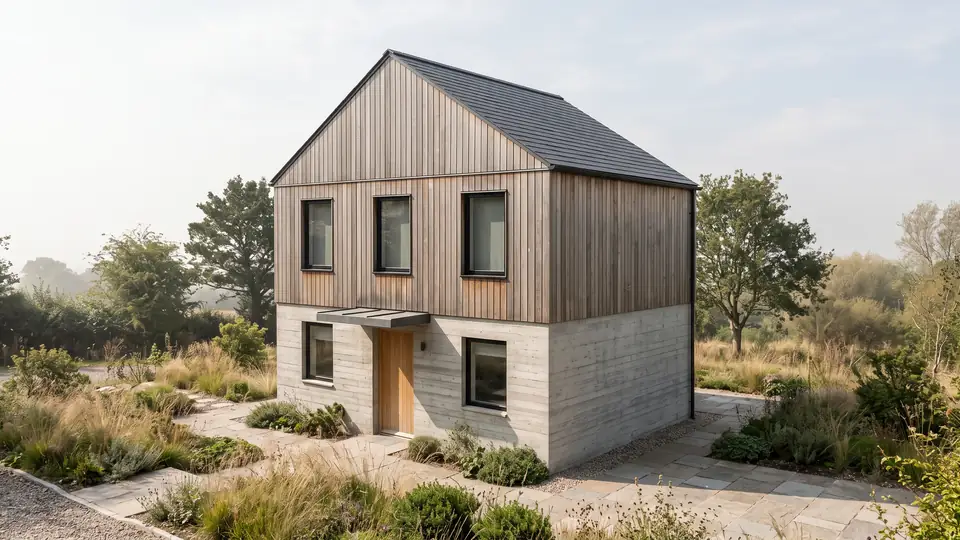
Test model, Nano Banana 2.1 at 2K, not retouched. How we tested
Three steps, nothing to set up
- 01
Screenshot your view
In SketchUp use File → Export → 2D Graphic, or just take a screenshot. Shadows on, axes and edges off.
- 02
Pick a style and a time of day
Six style presets, checked in our recipe test. Add a one-line materials note if you want.
- 03
Choose from four options
Download the one you like, or tap Brighter, Night or Add people & planting to get four more based on it.
Mid-grey or pure white: which clay works better?
Mid-grey wins in most cases. On a grey model the lit faces, the shaded faces and the cast shadows all stay visible. That shading tells the recipe where the sun is, and it keeps that direction.
Pure white under strong sun blows out. Two lit faces meeting at a corner turn the same flat white, so the edge disappears. Reveals and overhangs flatten, and the model has to guess the depth. If you prefer white, use soft light with low contrast.
| Mid-grey clay | Pure white clay | |
|---|---|---|
| Light direction | Clear from the shading | Often lost on lit faces |
| Corners between lit faces | Visible | Can merge into one plane |
| Window reveals | Read as depth | Can look flat |
| Works well with | Direct sun and shadows | Soft, overcast light only |
How to make a clay view in SketchUp
SketchUp makes a clay view through a style setting. Labels can vary by version and platform.
- Open the Styles panel and click the Edit tab.
- Click Face Settings and set Front Color to a mid-grey, around RGB 170.
- Choose the face style Shaded Using All Same, so every face uses that grey.
- Under Edge Settings, turn off Edges. In a clay view, black edge lines can come back as dark trim.
- In the Shadows panel, turn shadows on and set a time with low, raking sun.
- Export with File → Export → 2D Graphic.
How to make a clay view in Rhino or Blender
In Rhino, the Arctic display mode turns objects and background white and adds soft shadows. It is close to ambient occlusion. Its settings live under Options → View → Display Modes → Arctic (Preferences on a Mac), where you can change the background.
In Blender, open View Layer properties and use Override → Material. Pick a neutral diffuse material; it replaces every material in that view layer without touching your scene. Render as usual and save the image.
- Rhino: set the viewport to Arctic from the viewport title menu.
- Rhino: save the view with the ViewCaptureToFile command.
- Blender: View Layer properties → Override → Material, then a grey diffuse material.
- Blender: render, then save the image as PNG or JPEG.
How are materials chosen for a clay model?
The style sets the palette. Concrete & glass gives board-formed or smooth grey concrete and dark steel. Mediterranean gives lime-washed walls and terracotta. Warm timber gives vertical cedar or larch with black window frames.
To steer finishes, add a note of up to 200 characters, such as "dark brick base, pale limestone upper floors". The model follows it as best effort. The note is for materials only, not form. Glass is the usual weak spot in clay views: a pane modeled in the same grey reads as a solid panel. Give glass a darker grey or some transparency before you export, so the openings read as openings.
ArchFor at a glance
- What it is
- ArchFor is a web app that turns 3D model screenshots, sketches and existing renders into photorealistic architectural images. Credit packs from $9.99; no plugin and no subscription required.
- Inputs
- One JPG, PNG or WebP up to 10 MB: a model screenshot, clay model, hand sketch or elevation from any software
- Output
- Four images per click at the size you choose (1K, 2K or 4K; 2K by default), in the shape of your upload
- Time
- Usually under a minute at 2K; 4K takes a minute or more
- Price
- 1 credit per image at 1K, 2 at 2K, 3 at 4K. Packs from $9.99 for 80 credits (40 images at 2K); monthly plans from $19.99; no free tier
- Model
- Nano Banana 2.1, a Google Gemini image model (ArchFor isn't affiliated with Google)
- Privacy
- Uploads and results are private and deleted after 14 days
Pay for what you render
No subscription needed. Failed renders are refunded automatically.
Questions
Which grey works best?
A mid-grey around RGB 160 to 180 with direct sun works best. It keeps edges and shadows readable, so the recipe can follow your light.
Can I set materials per surface?
Not per surface. You pick a style and can add a one-line note that names materials and where they go. The model follows the note as best effort, so check each option.
Does it work with Blender or Rhino clay renders?
Yes. ArchFor reads any JPG, PNG or WebP up to 10 MB. An Arctic capture from Rhino or a material-override render from Blender works the same as a SketchUp export.
Will my shadows stay exactly where they are?
The direction stays; the exact shapes can move a little. If shadows matter for a planning image, compare each option with your clay view.
What about a hidden-line export with no shading?
Use a shaded view instead if you can. A line-only image reads more like a drawing, so the Hand sketch input may suit it better than Clay.